How to create an autocomplete input with only HTML
Over the last few days, we’ve looked at how some awesome ways you can use one line of CSS to replace a bunch of custom JavaScript. Today, we’re going to look at how to create an autocomplete input with only HTML.
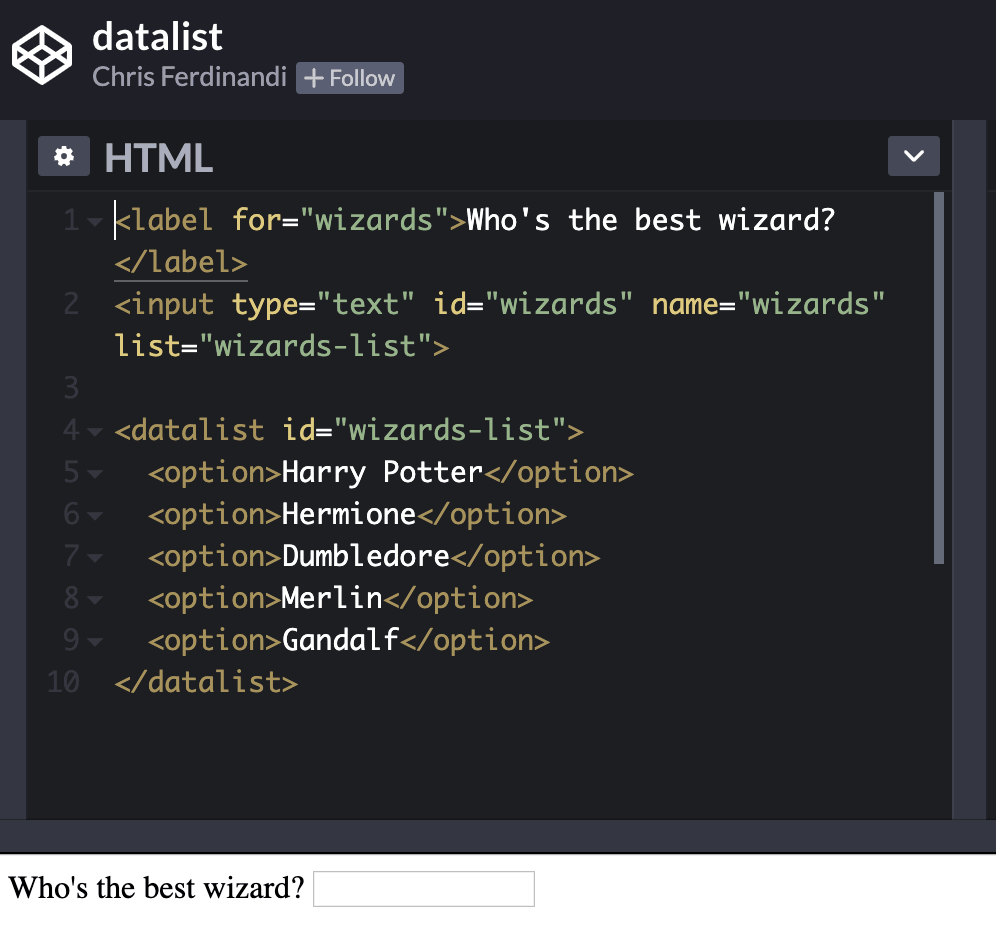
The datalist element #
To make this work, start by creating a label and input like you normally would.
<label for="wizards">Who's the best wizard?</label>
<input type="text" id="wizards" name="wizards">
Next, create a datalist element.
In it, add an option element for each autocomplete choice. Using the example above, we’d create an option for each wizard.
<label for="wizards">Who's the best wizard?</label>
<input type="text" id="wizards" name="wizards">

<datalist>
  <option>Harry Potter</option>
  <option>Hermione</option>
  <option>Dumbledore</option>
  <option>Merlin</option>
  <option>Gandalf</option>
</datalist>
Finally, we need to associate the datalist with the input.
Give the datalist an ID, and add the list property to your input with a value equal to your datalist ID.
<label for="wizards">Who's the best wizard?</label>
<input type="text" id="wizards" name="wizards" list="wizards-list">

<datalist id="wizards-list">
  <option>Harry Potter</option>
  <option>Hermione</option>
  <option>Dumbledore</option>
  <option>Merlin</option>
  <option>Gandalf</option>
</datalist>
Now, when the user types, the browser reveals a list of options they can choose from.
Demo.
See the Pen
datalist by Chris Ferdinandi (@cferdinandi)
on CodePen.
Browser Compatibility #
he datalist element works in all modern browsers, and back to IE10.


 и java.util.concurrent.Atomic*.weakCompareAndSwap().")

 на 100 слоях")


 в React")