How to use localStorage with React
The heart of every React application is its state. Components can have their own internal state and, believe me, despite being simple, you can do a lot of cool stuff with React’s state mechanism. But, let’s say you’re creating a nice app and, at some point, you need to save some user preference locally in the browser or even persist the complete state for one or more of your components. That is, you want to know: How to use localStorage in a React application? Well, setState won’t do this for you, but don’t worry, it’s really simple. Just keep reading!
Web Storage API
Web Storage is an API to store data in the browser, being a significant improvement compared to its predecessor, cookies. It started as a HTML5 API, later evolving to become an independent specification. It’s natively supported by virtually every browser in use today and even some legacy ones, like IE8. Web Storage is implemented in two different ways in browsers: localStorage (a persistent storage, which can be compared to persistent cookies) and sessionStorage (a storage that persists for duration of the session, comparable to session cookies). Though this article focus on localStorage, you can also apply the same principles when using sessionStorage.
Our example component
We need a component to play around with. Well, I think a sign-in page with a “Remember me” option is a perfect fit. For simplicity’s sake, we won’t include a password field, since it shouldn’t be persisted. Let’s check out its render method:
render() {
  return (
    <form onSubmit={this.handleFormSubmit}>
      <label>
        User: <input name="user" value={this.state.user} onChange={this.handleChange}/>
      </label>
      <label>
        <input name="rememberMe" checked={this.state.rememberMe} onChange={this.handleChange} type="checkbox"/> Remember me
      </label>
      <button type="submit">Sign In</button>
    </form>
  );
}
As you can see, it’s a pretty simple form, with two inputs and a button. The code needed to handle its state is equally easy to understand:
export default class SignIn extends Component {
  state = {
    user: '',
    rememberMe: false
  };

  handleChange = (event) => {
    const input = event.target;
    const value = input.type === 'checkbox' ? input.checked : input.value;

    this.setState({ [input.name]: value });
  };

  handleFormSubmit = () => {};

  render() { /*...*/ }
}
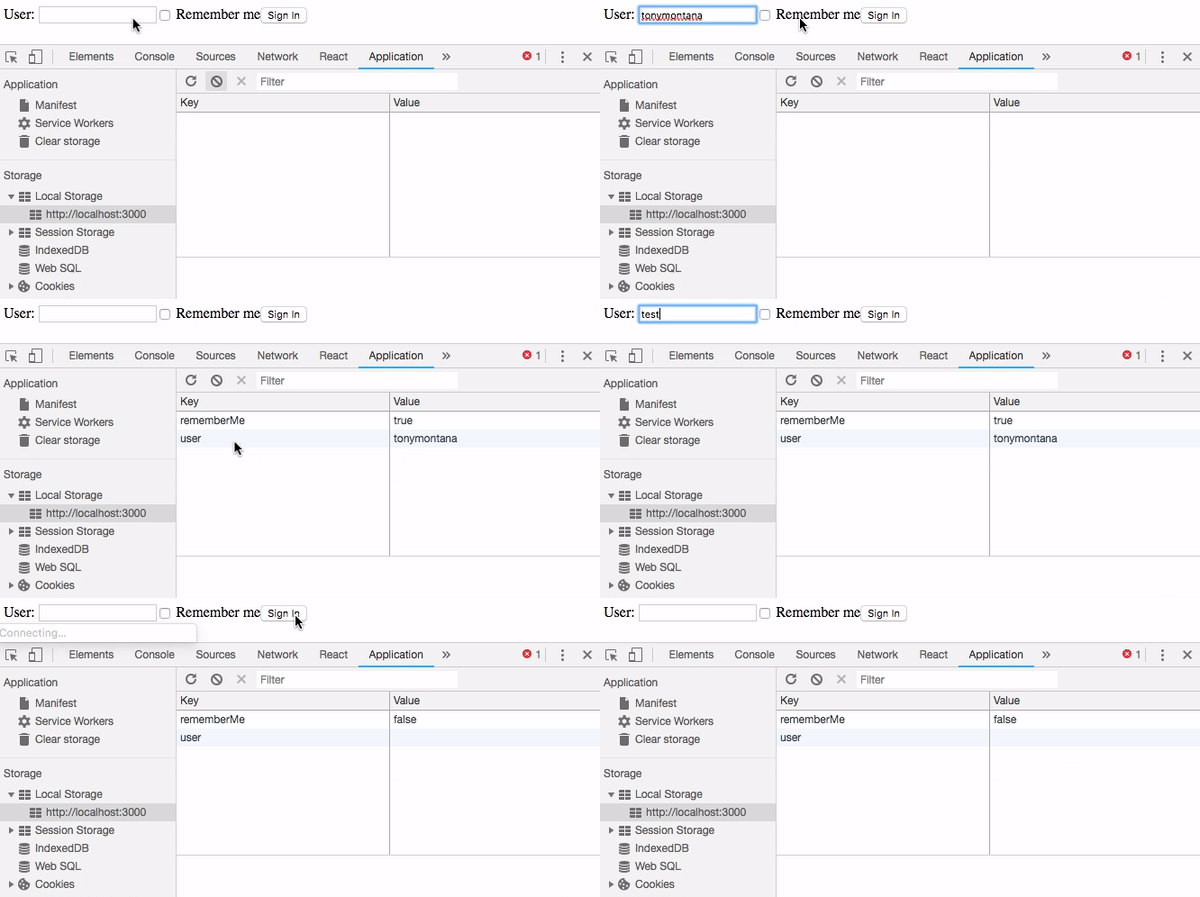
In the above piece of code, we’re using the setState method to keep the component’s state up-to-date every time a change occurs in our form. If you run the project, here’s what you’ll get:
Note: I know its appearance is raw, but for the purpose of this article, let’s turn a blind eye to this. =)
If you fill the User input, then check the “Remember me” option and finally click the “Sign in” button, you’ll notice that the page is reloaded and the form becomes empty again:
This behavior is completely normal. Now, we will learn how to use localStorage with React and make this form work as expected.
Step 1: Saving data in the localStorage
We have two things to be stored in our example:
- The value of the “Remember me” option
- The user name (only if the “Remember me” option is checked)
The perfect place to persist these values is in the handleFormSubmit method:
handleFormSubmit = () => {
  const { user, rememberMe } = this.state;
  localStorage.setItem('rememberMe', rememberMe);
  localStorage.setItem('user', rememberMe ? user : '');
};
So, what is really happening in this method?
- First, we use destructuring assignment to initialize two variables
- Then, we’re calling the localStorage.setItem method to store the value of the “Remember me” option
- Finally, we persist the user name too, but only if the “Remember me” option is set to true
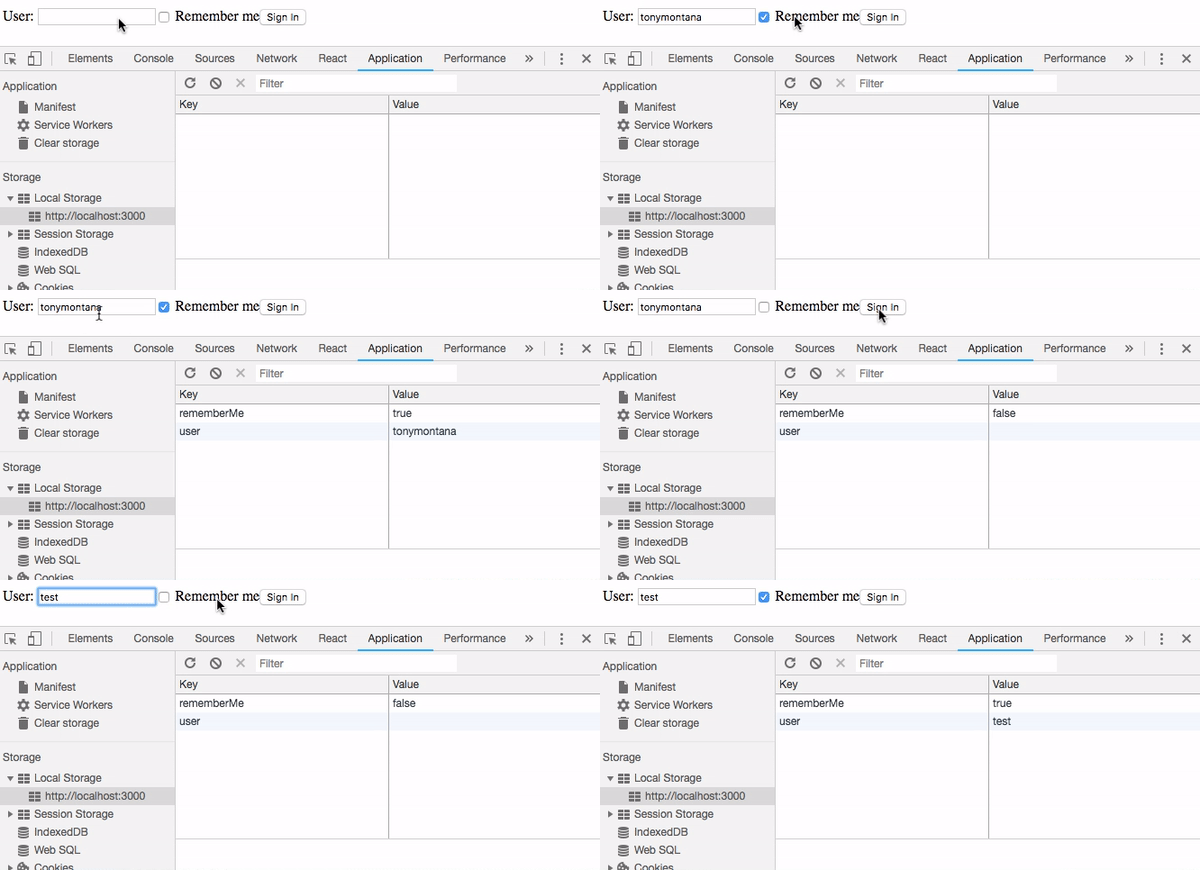
And this is what we have so far:
Ok, we’re halfway there. Now we need to get back those values to rehydrate our component.
Step 2: Retrieving data from the localStorage
We’ll put our data retrieval logic in the componentDidMount lifecycle method, but you can safely put it in your constructor, if you want to, since its purpose is to set the initial state of our component.
Note: You can’t call setState before the component is mounted, so, if you prefer the constructor approach, just set the state property directly instead. As for me, I like to keep my constructors as clean as possible, but it’s a matter of personal preference.
componentDidMount() {
  const rememberMe = localStorage.getItem('rememberMe') === 'true';
  const user = rememberMe ? localStorage.getItem('user') : '';
  this.setState({ user, rememberMe });
}
Let’s understand it better:
- The first thing we do is to get the value of the “Remember me” option. Did you notice that comparison with the string “true”? Well, this is because localStorage persists data as string. This way, we need to get the stored value and parse it back to a boolean before using it. You could also use JSON.parse instead of this ugly expression if you were sure that there would always be a “boolean-like string” stored in this item, but this is not the case here, since this value is unset the first time our page is initialized.
- Secondly, we retrieve the user name, but only if the rememberMe variable is true.
- Lastly, we assign these values to the component’s state.
And here’s the magic happening:
Great! Everything worked as expected. Take a look at the final code, here.
A final tip
As I mentioned above, localStorage can only store data as string. If you’re dealing with just a few persisted values, this is no big deal. But if you intend to make a significant use of localStorage throughout your application, I totally recommend you to pick a library to make it easier to save and retrieve data and to abstract things like stringification and parsing. An excellent and battle-tested option is Store.js. That’s my personal recommendation. =)
Conclusion
- Using localStorage with React is really simple. Just find out what are the best moments to save and get back your data. This will change from component to component.
- Generally speaking, you can rehydrate your component both in the constructor and in the componentDidMount lifecycle method. Please note that if you’ve opted for the constructor approach, you must define your state by directly setting the state property, since the setState method won’t be available before the component is mounted.
- If you need a good library to handle things such as stringifying and parsing localStorage data, consider using Store.js.


